
In a series of posts I will show you how to make a maze in a wide variety of design constructions. The 7th example with look at an Axonometric maze construction. Let’s define what I mean, then get into the example. Every example will use the sample basic outline (the state of Ohio) to better illustrate the differences between each maze type, however this maze type is best utilized for items you want to give some depth to. A cube, and other 3-dimensional objects work best for this maze type. If you are more visual, make sure to check out the video of a cube maze being made at the end of the post.
Axonometric Grid Maze - This is a maze made using an axonometric grid. Typically these grids are used to draw 3 dimensional representations of objects like a cube. But, for maze making this just means drawing walls at the angle of the axonometric grid.
How to Make an Axonometric Maze
Step 1 - Draw the Outline
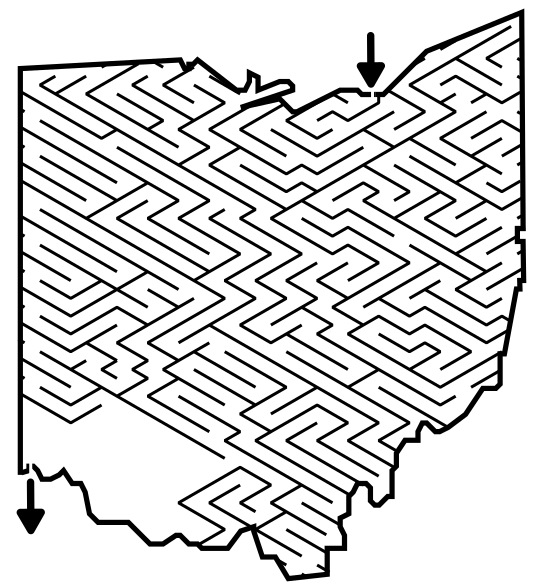
The outline of the maze makes the outer wall of the maze. It can be anything from a simple shape like a square, to a complex picture. The outline should be thicker than the internal lines to give the maze definition. In the example below I chose the state of Ohio. Unique to my example is this outline is not actually made using the Axonometric grid, while 99% of creation WILL use the grid in this step.
Step 1.5 - Choose the Start and Goal
For the below example I chose the start of Cleveland and the goal of Cincinnati. I made an entrance in Cleveland but I usually wait until I am in the last stage of drawing maze lines to draw the exit point for the goal. This is in case I need to adjust the location slightly based off of my design. This works if drawing a maze digitally, but for a hand drawn maze the outline will need to have a pre-determined start and goal.

Step 2 - Determine your grid shape
When making a regular grid maze you are choosing the size of the grid boxes you will use. So a 20x20 grid is larger than a 10x10 grid. When choosing an axonometric grid you may choose the size, but more importantly is choosing the angles of the grid you will be using see the 3 examples below. The first grid uses angles of 20 degrees, the second 30 degrees, and the last 45 degrees (making essentially regular grids tilted at a 45 degree angle). My program defaults to 30 x 30 unless I change it and seems to work well for almost everything.

20 x 20 Grid
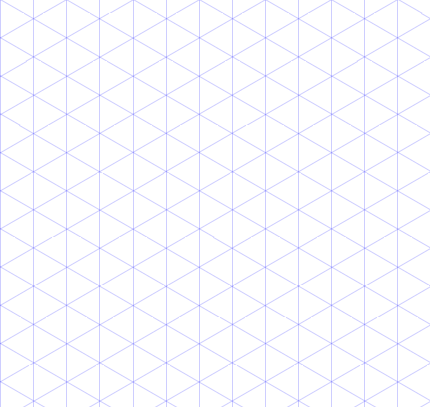
30 x 30 Grid

45 x 45 grid
Step 3 - Start Drawing the Walls
Using the axonometric grid pattern, begin drawing the maze walls starting at the entrance of the maze. Be careful to never close all open paths so the maze can be solved. As you make the maze decide how difficult you want to make it. A low amount of path choices, and short dead end paths will make an easy maze. Longer dead ends and lots of path choices make a more difficult maze.

Step 4 - Keep Drawing Walls
Like most mazes the middle part of design is a lot of keep doing what you are doing a draw more walls moving possible solutions towards the goal.


Step 5 - Complete the Maze
Draw the final walls and draw the exit. You have completed the drawing of an Axonometric maze !

Step 6 (Optional) - Draw the Solution
While the correct pathway is fresh in your mind, draw the solution to the maze. This is especially important with more complex mazes. It can also be a check to make sure your maze has a solution and helps you determine how difficult it is.

Other examples of Axonometric mazes that highlight the construction:
The Stairs maze naturally works as it helps to give the maze dimension. Notice how the direction of the walls is consistent with the plane of the object to help give it the dimensional look. The Lemon Meringue Pie maze uses the construction to draw the maze at the proper angle to the picture. And of course, where the construction really shines is on the Cube Maze !

Stairs Maze

Lemon Meringue Pie Maze

Cube Maze
A very important design note not covered in the step by step above is to follow the direction of the object when making your pathways. This will give your object dimension and make for a better looking maze. Both of the below cubes were made using an Axo grid, but the one on the left follows the direction and flow of the object while the one on the right does not. Personally I think the example on the left is a much better maze. Imagine the Steps maze above if it did not use the objects flow to make the pathways.

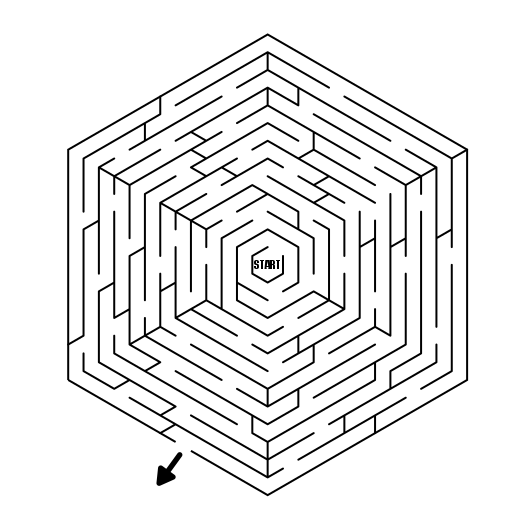
Axonometric grids also serve as the base for geometric mazes that aren’t square or rectangular, like this example of a Hexagon maze. However, I do not consider this a pure axonometric maze, but instead an Escape Maze !
and this example of a triangular maze using the grid (again an Escape Maze!).

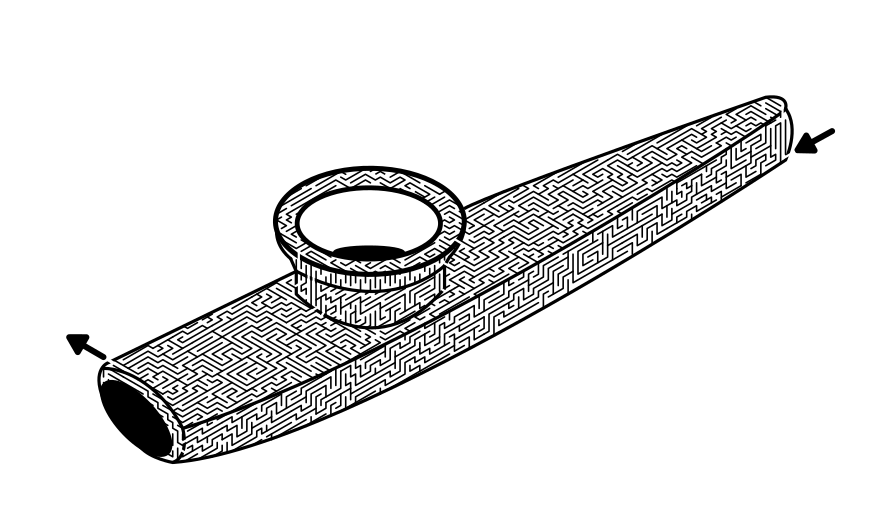
And sometimes the shape of the item lends itself to grid that is tilted at an angle. I really like this Kazoo Maze. How many kazoo mazes have you seen before ?
Making of an Axonometric Maze Video
Watch this quick video to get a sense of how an Axonometric Cube maze is made.
Interested in learning how to make or draw other types of digital mazes ? I have step by step instructions on how to make over 40 different maze types.
If you prefer making labyrinths, you can find step by step labyrinth making instructions.